Create Ambience with Landscape Outdoor Lighting: How to Choose the Right Fixtures
Think about the last time you walked into a room and felt an immediate sense of calm, or excitement, or romance. Chances are, the lighting played a starring role. Light is emotion made visible. Now, imagine harnessing that power outside, in your own garden. The transition from a dark, shapeless yard to a thoughtfully illuminated sanctuary is one of the most dramatic changes you can make to your home. But with so many fixtures, styles, and technical terms, where do you even begin? The secret isn't in finding the single "perfect" light; it's in learning how to choose a collection of fixtures that work in harmony. This guide will help you move from confusion to confidence, showing you how to select the right tools to paint with light, set the mood you crave, and make your outdoor space an extension of your personal style and comfort.
Understanding Different Lighting Types: Your Artistic Toolkit
Before you fall in love with a fixture's design, it's crucial to understand its job. Think of lighting types like brushes in an artist's studio—each creates a different effect. Professional designers use three functional layers to build a complete scene: Ambient, Task, and Accent.
The Three Layers of Light:
- Ambient Lighting: This is the general, overall glow—the "moonlight" of your garden. It softly fills the space, banishing total darkness and creating a welcoming base. It often comes from light reflected off walls, downlighting from trees, or the diffuse twinkle of overhead strings.
- Task Lighting: As the name implies, this is light for a specific job. It's practical and essential for safety and functionality. Its purpose is to help you see clearly to navigate, cook, or read. This is the layer that includes path lights, step lights, and grill-area lighting.
- Accent Lighting: This is the drama and the sparkle. Accent lighting is purely for visual interest, used to highlight what you love—a majestic tree, a textured wall, a piece of sculpture. It creates focal points and adds depth.
Meet the Fixtures (The "Brushes"):
Now, let's match the tools to these layers.
- Spotlights & Floodlights: These are your primary tools for accent lighting. A spotlight has a narrow, focused beam, perfect for pinpointing a single object like a garden statue or a unique plant. A floodlight has a wide, "washing" beam, ideal for lighting up a broad surface like a garage door, a large tree canopy, or a fence. Both can also contribute to ambient light when aimed at a light-colored wall or ceiling.
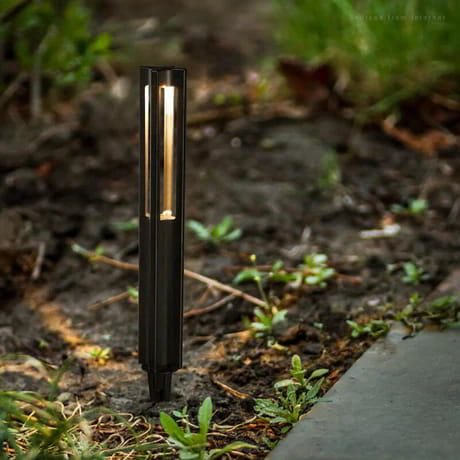
- Path Lights: The stars of task lighting. They are designed to cast light downward or to the sides to define walkways, steps, and borders. For a reliable, energy-efficient, and safe system, Low voltage path lights are the industry standard. They provide ample illumination for safety, connect to a central transformer for easy control, and come in countless styles to match your aesthetic.
- String Lights & Tapes: These are ambient champions. Bistro string lights, with their large, globe-shaped bulbs, create a festive, inviting canopy over a dining or seating area, instantly defining an "outdoor room." For a more modern, streamlined ambient or task light, strip lighting (using outdoor-rated LED tape) is a versatile option. It can be discreetly installed under railings, along steps, or under the eaves of a pergola to provide a continuous, even line of light.
Selecting Fixtures Based on Style: Making it Feel Like Home
Your lighting shouldn't look like it was dropped in from a showroom; it should look like it grew there. The style of your fixtures should have a conversation with the architecture of your home and the vibe of your garden.
Matching Your Home's Architecture:
- Traditional/Classic Homes: (Think Cape Cod, Colonial, Tudor) Look for fixtures with classic lines, lantern shapes, and warm finishes like black, bronze, or aged brass. Glass panels and cross-hatch details are common.
- Modern/Contemporary Homes: (Clean lines, flat roofs, mixed materials) Opt for sleek, geometric shapes in finishes like brushed nickel, stainless steel, or matte black. Cylinders, cubes, and minimalist designs work beautifully.
- Rustic/Cottage Gardens: (Natural materials, informal plantings) Choose fixtures with a handmade or weathered look. Wrought iron, hammered copper, and lanterns with simple glass work well.
Choosing Finishes and Colors: The finish is more than just color; it's about how the fixture will look both day and night. A dark bronze or black finish will tend to recede into the landscape during the day, letting your garden shine. A polished brass or copper will act as a decorative element even when off. Remember, the finish needs to be rated for outdoor exposure to prevent premature tarnishing or corrosion.
The Bulb Matters: The light source itself is part of the style. The warm, golden glow of a vintage-style filament LED outdoor bulb in an exposed fixture can be a design feature in itself, adding a nostalgic, cozy feel to a bistro setting or a traditional lantern. Always choose LED bulbs for their efficiency, longevity, and now, their beautiful light quality.
Lighting for Specific Areas: Zoning Your Outdoor Canvas
Breaking your yard into "zones" with specific purposes makes choosing fixtures much easier. Each zone has different lighting needs.
1. The Dining & Entertainment Zone (Patio/Deck):
- Goal: Create a warm, inviting, and functional social space.
- Fixture Strategy: Start with bistro string lights overhead for festive ambient light. Add wall sconces or post lights for additional ambient glow. For task lighting, consider low-voltage strip lighting under railing caps or built-in benches to illuminate the floor area safely. A discreet spotlight in a nearby tree can provide downlighting that mimics moonlight.
2. The Journey Zone (Pathways, Steps, Driveways):
- Goal: Ensure safe, comfortable, and beautiful navigation.
- Fixture Strategy: This is the domain of Low voltage path lights. Space them evenly (usually 8-10 feet apart) to create a rhythm and guide the eye. For steps, use integrated step lights for safety. Avoid placing lights in a straight line on both sides of a path, which can create a "runway" feel. Instead, stagger them or use them on one side for a more natural look.
3. The Feature Zone (Trees, Sculptures, Architecture, Water):
- Goal: Create drama, highlight beauty, and add depth.
- Fixture Strategy: Use well lights (in-ground) or spotlights to uplight trees, graze textured walls, or silhouette sculptures. For water features, underwater LEDs can create magical effects. The key here is subtlety—you want to see the effect (the glowing tree), not the source (the fixture hiding in the bushes).
4. The Utility & Security Zone (Garage Side, Back Door, Perimeter):
- Goal: Provide safety, security, and light for tasks like taking out the trash or unlocking a door.
- Fixture Strategy: Wider-angle floodlights or motion-sensor wall packs are ideal. Choose fixtures with shields to direct light downward and prevent "light pollution" that bothers neighbors. Even utility areas can be stylish; a well-designed brass flood light provides powerful light while maintaining a classic look.
Durability and Weather Resistance: Built to Last
The most beautiful fixture is useless if it rusts, cracks, or fades after one season. Outdoor lighting must be built for battle.
The IP Rating – Your Secret Decoder: Look for the Ingress Protection (IP) rating on product specifications. It’s followed by two digits (e.g., IP65).
- First Digit (Solid particle protection): A '6' is the best, meaning "dust tight."
- Second Digit (Liquid protection): For outdoor fixtures exposed to rain, a '5' (protected against water jets) is good, but '6' (protected against powerful jets) or '7' (protected against temporary immersion) is better for in-ground or pond lights.
Materials Matter:
- Marine-Grade Brass, Copper, Bronze: Excellent natural corrosion resistance, often developing a desirable patina.
- Powder-Coated Aluminum: Lightweight and highly resistant to rust; the powder coating provides color and extra protection.
- Stainless Steel: Extremely durable and corrosion-resistant, ideal for coastal or harsh climates.
- Avoid: Thin plastics and finishes that aren't explicitly rated for full outdoor exposure.
The Heart of the System: The Transformer: None of your carefully chosen Low voltage path lights or spotlights will work without the unsung hero: the landscape light transformers. This box, plugged into an outdoor GFCI outlet, converts your home's 120V current to safe 12V. When choosing one, get a wattage capacity at least 20-30% higher than the total wattage of all your lights to allow for future expansion. A transformer with a built-in timer or photocell is a must for automated, energy-efficient operation.
Installation & Maintenance: Protecting Your Investment
A little planning and care ensure your beautiful system performs flawlessly for years.
Installation Tips:
- Plan on Paper First: Sketch your yard and plot fixture locations. This helps you calculate wire runs and transformer size.
- Hide Your Wires: Use designated low-voltage landscape wire and bury it 6 inches deep or hide it under mulch.
- Protect Connections: Use waterproof wire connectors for all splices to prevent corrosion, which is the #1 cause of system failure.
- Test Before You Bury: After connecting everything, turn on the system at dusk to adjust fixture angles and confirm placement. It's much easier to move a wire before it's buried.
Simple Maintenance:
- Seasonal Cleaning: Wipe fixture lenses and bulbs (like your LED outdoor bulbs) with a soft, dry cloth to remove dirt and bugs that can block up to 50% of the light.
- Trim Back Growth: Plants grow! Regularly prune foliage that begins to block or crowd your fixtures.
- Annual Check-Up: Once a year, check connections at the transformer and a few fixtures for corrosion, and ensure the transformer timer is correctly set.
Conclusion
Choosing the right outdoor lighting fixtures is a joyful process of blending art and science, feeling and function. It’s about understanding the roles different lights play, selecting styles that sing in harmony with your home, and ensuring they are built to weather the years. Forget about simply "adding lights." Instead, think about "sculpting with light" and "setting the scene."
Start with a small, manageable area—perhaps your front walk with some elegant Low voltage path lights and one beautiful accent light on a tree. See how it transforms the space and how it makes you feel. Let that success inspire your next step. Remember, the goal is to create an ambiance that invites you outside, makes you feel safe, and turns your property into a personal haven that shines just for you. Your perfect outdoor atmosphere is waiting; you just have to choose the right light to reveal it.
News Photos
The latest news on shopping malls - product promotions, celebrity visits, product launches, events for kids, band performances, DJ Nights, Festival Celebrations, Social Causes and more.
 |
Social Network
|
|
|
|
|
|
Partner Sites
![]()